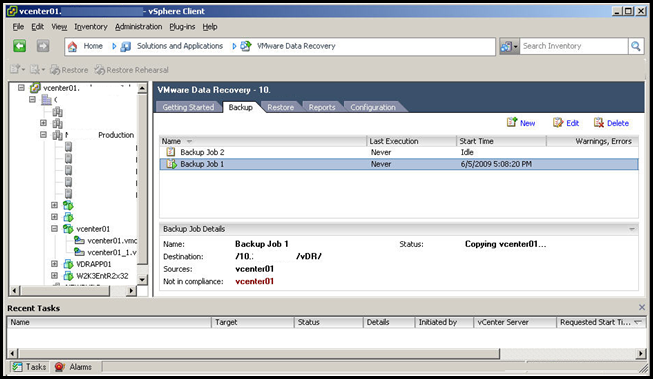
Configuring a Network share for VMware Data Recovery (vDR)
Now that you have dutifully followed John Simon’s clever documentation on installing vDR, you’ll need to give your little appliance some storage space to dump those backups too. Network shares are a flexible, easy fit for this. Once your dumps are on the share, you can easily schedule your tape software to swoop in and ship them to tape. Depending on the type of network share, replication to your Disaster Recovery site is another logical step. But it all begins with the Network storage, so let’s get to John’s doc.
- Enter the IP address or case sensitive name of the data appliance and click Connect:
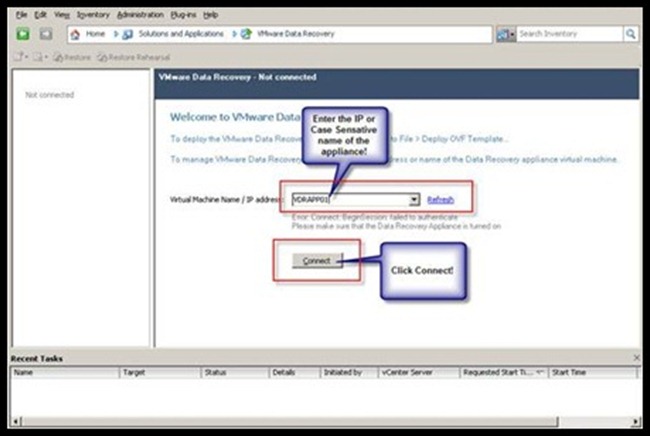
- Enter your VirtualCenter password and click OK:
- At the getting started wizard enter the domain admin service account that will be used to connect to vCenter and authenticate and click next:
- Click the button to Add Network Share:
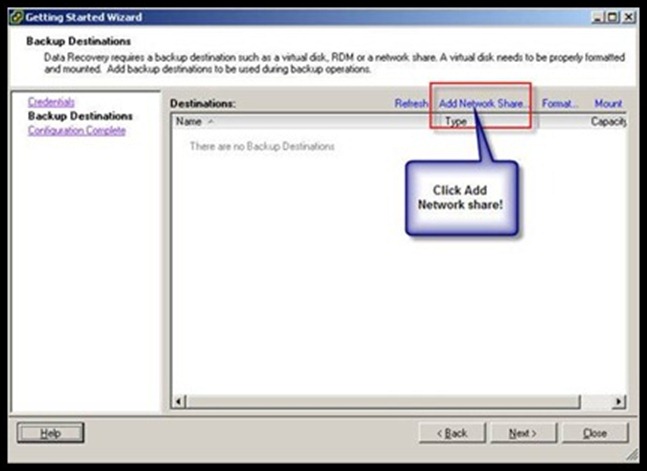
- Enter the information in the popup window to add a network share
****NOTE**** The URL for the share MUST USE the IP address for the server and NOT the hostname of the server as it is NOT supported.
ALSO you MUST NOT put a domain before the user name as that is NOT supported either: - Verify your share is added and click Next:
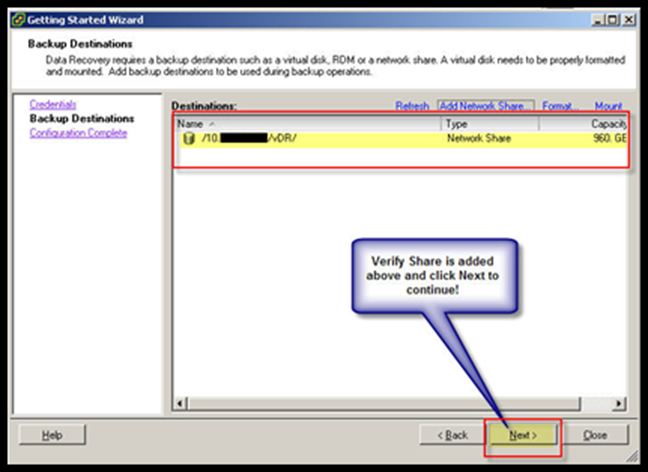
- Verify information and Leave the check box to create a new backup job to create the vCenter server backup and click Close:
- When Backup Job 1 pops up, expand your vcenter all the way down to the vm level. Check the box next to the vcenter01 server and click Next:
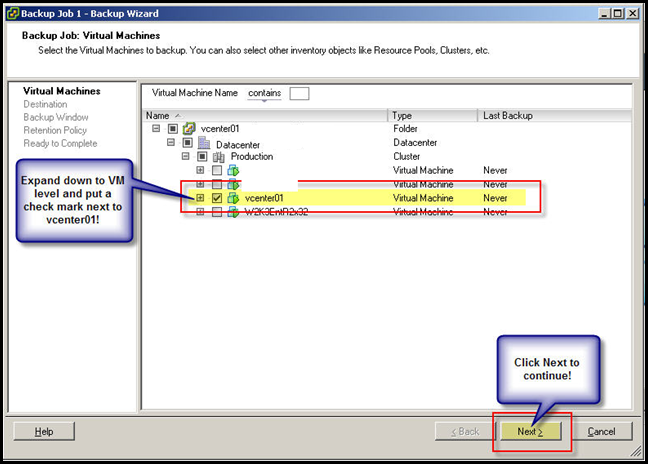
- Select destination for backup which is our Network Share we attached and click Next:
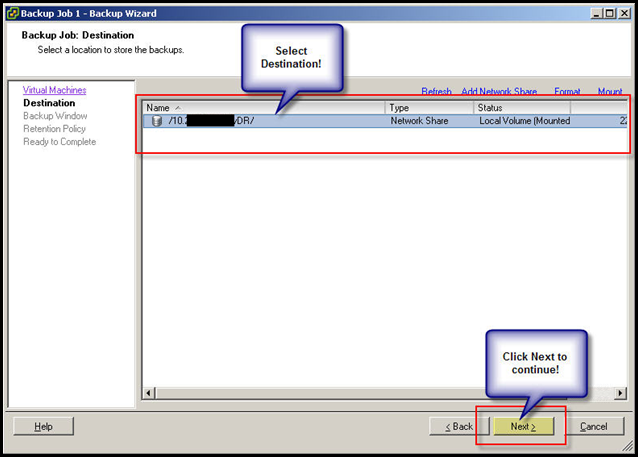
- Create a backup window to cover business hours when you DO NOT want a backup to occur. Each machine will back up once per day during available times only. Click Next to continue:
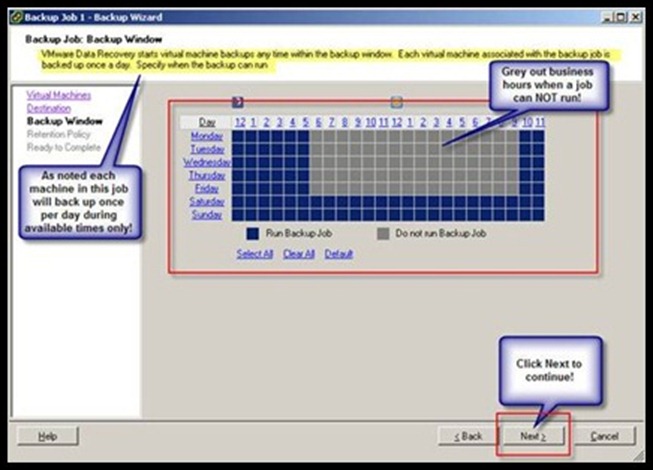
- Determine the policy that works for your corporate policy (for our example we will use the FEW option) and click Next to continue:
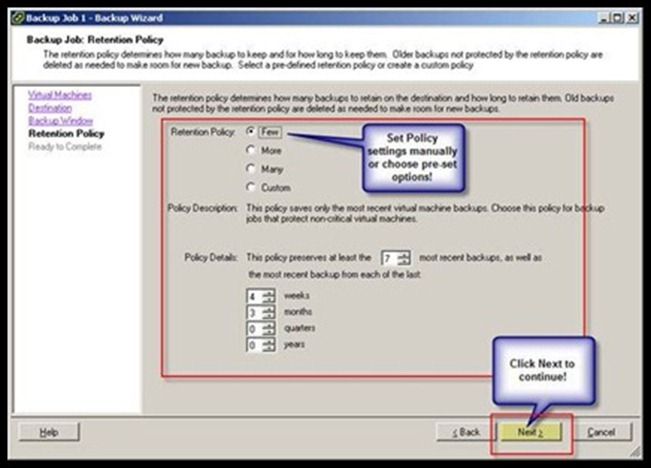
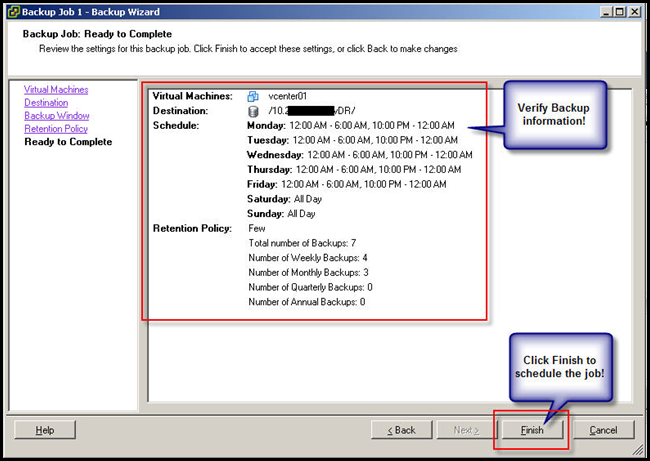
- Verify all information and click Finish to Complete the job:
- Verify that your jobs are created:
